How to Create a Bot Account
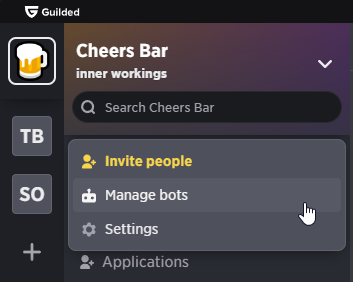
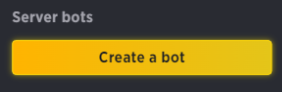
Navigate to the “Manage bots” page in your server and press “Create a bot”.
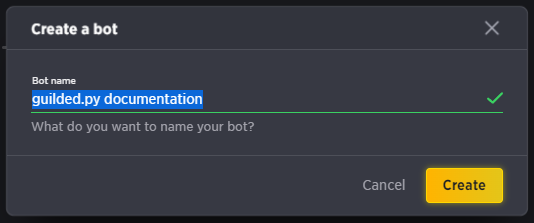
Give your bot a name and click “Create”.
Navigate to the “API” tab.
Warning
You must set a prefix (in the “General” section) if you want to be able to receive command messages without requiring the “Receive all socket events” permission.
If your bot uses multiple prefixes or processes messages that are not commands, keep in mind that users must keep this permission enabled for your bot. Otherwise, just set your prefix and you will receive all messages that match it, regardless of if you have the permission.
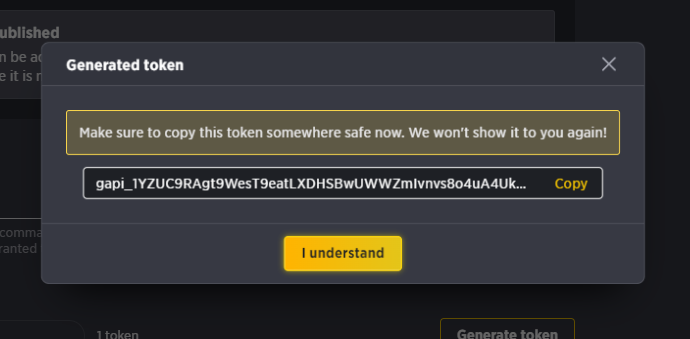
Scroll down to “Tokens” and press “Generate token”. Copy the newly generated token.
Guilded will never show you this token again. You may create multiple auth tokens and delete them individually in the event that one of them gets leaked.
You can see when a token was last used in this section in case you suspect that it has been leaked. This timestamp (“Last used”) exposes when an API request was last made with it, or when it was last used to connect to the gateway.

Danger
Obviously, do not share any auth tokens you create. This token can be used by bad actors to do anything that you can do with it.
You can now use this auth token (or any others you create) to authenticate with Guilded’s bot API:
client = guilded.Client()

client.run(auth_token)
Publishing Your Bot
Once your bot is ready to release into the wild, you can publish it by enabling the “Publish bot” toggle in the bot’s API tab.
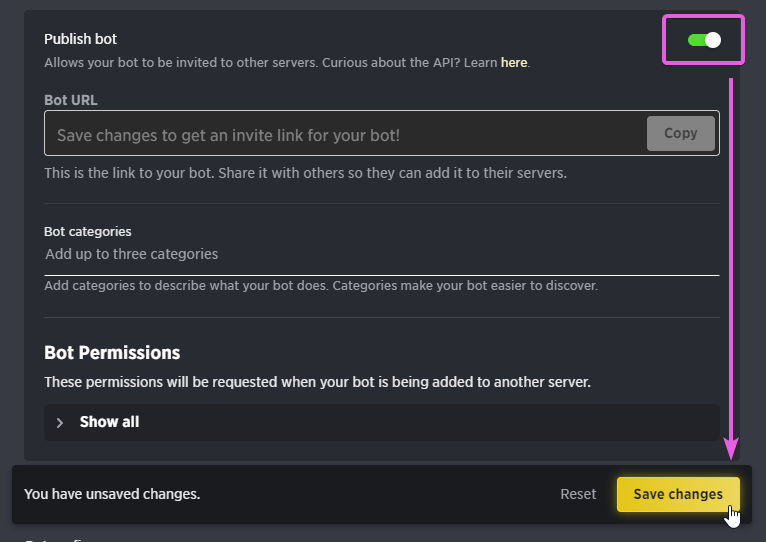
This will create a link that anyone can use to invite your bot to their server. It has permissions built-in, which can be customized in the “Bot Permissions” drop-down. When users invite your bot, a role will be created with the permissions you configured.
To unpublish your bot, toggle the “Publish bot” switch once more and input the confirmation phrase (“Unpublish <bot name>”), then save your changes.